Yes! Let’s Encrypt SSL can be installed on GoDaddy, and the procedure is quite simple.
We have seen various discussions as to whether Let’s Encrypt SSL is supported by GoDaddy or not. We have seen quite a few negative comments about non-support. But after an experiment we have proved the opposite.
But how have we acted with our Websites and our clients.
In many cases we have installed Let’s Encrypt SSL.
Everyone has the right to save as much money as they can.
We have a business site that is important to us. Because of the importance we have bought an SSL from GoDaddy, because of the need to avoid the complications of SSL renew, we have an address where we can ask for help, and this makes us feel more relaxed.
Ok, we will not waste either our time or yours. We will go straight to the steps you need to follow to install a Let’s Encrypt free SSL on GoDaddy shared hosting.
To install Let’s Encrypt SSL in GoDaddy using cPanel follow these steps:
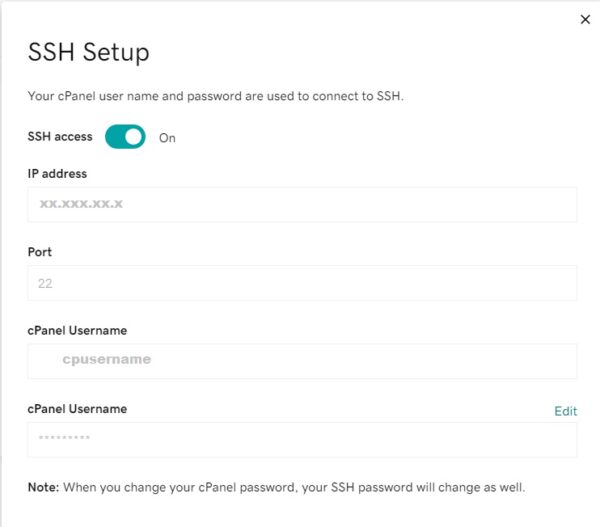
- Open your GoDaddy account, go to your products then enable SSH (See photo below).
- Second step is very important. Disable all domain redirects: WWW, HTTPS, ending slash “/” and any other redirects you may have. This is due to domain verification.
- Deactivate or pause any third party CDN if you’re using any. If’ you’re ussing Cloudflare click “Pause Cloudflare on Site” and “Purge everything”.
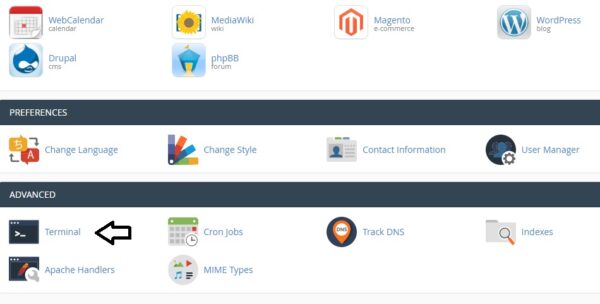
- Use an telnet app such as Putty however, you can also start from cPanel by clicking on the Terminal icon.
You need to make sure that the default CA in Acme is Let’s encrypt (here is a clarification)
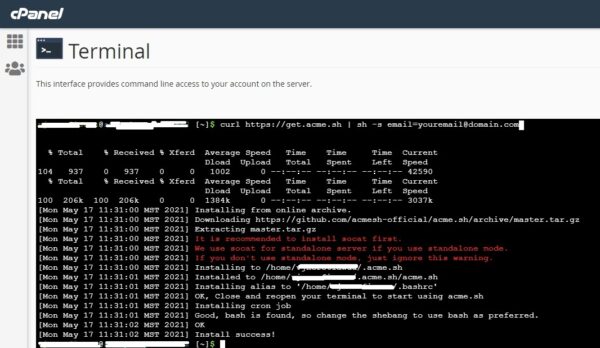
Now, in the Terminal (SSH) window enter these commands:
-
curl https://get.acme.sh | sh -s [email protected] -
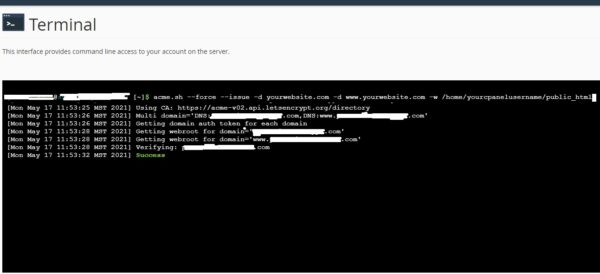
acme.sh --force --issue -d example.com -d www.example.com -w /home/yourcpanelusername/public_html -
acme.sh --deploy -d example.com -d www.example.com --deploy-hook cpanel_uapi
Replace above [email protected] with your real email and example.com with your domain name.
If you see a message like this “acme.sh: command not found” when you enter command on step 2, logout then login again and procced with step 2, 3.


